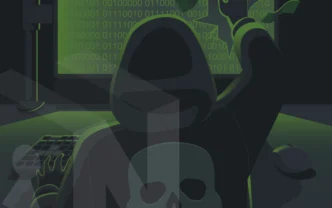

A VPN that hides your IPv4 address but lets your browser broadcast your local IP through a STUN request is not anonymity — it’s theater. The same goes for a setup that tunnels web traffic flawlessly while DNS queries continue to reach your ISP’s resolver, or that masks IPv4 perfectly while leaking IPv6 traffic untouched. Each of these failures is invisible to the user. The browser still loads. The VPN client still says “connected.” And somewhere upstream, your real identity is being handed out in the background.
This guide walks through the three leak vectors that consistently bypass VPNs and proxy chains — WebRTC, DNS, and IPv6 — explains the mechanism behind each, and lays out a concrete testing methodology you can run in under ten minutes. The goal is verification, not vibes. If your threat model demands anonymity, you need to confirm the setup works rather than assume it.
Why Leak Testing Matters More Than VPN Selection
Marketing copy from VPN vendors implies that picking the right product is the hard part. It isn’t. Configuration drift, browser quirks, operating system defaults, and protocol mismatches routinely break leak protection on services that advertise it. Windows ships with Smart Multi-Homed Name Resolution (SMHNR) and Teredo, both of which can push DNS or IPv6 traffic outside an active tunnel. Chromium-based browsers expose ICE candidates through RTCPeerConnection regardless of system proxy settings unless explicitly restricted. Many VPN clients still don’t tunnel IPv6 at all, leaving an entire address family routed straight through your ISP.
The leak tests below don’t depend on trusting the VPN vendor’s word. They probe what your browser and operating system actually emit, against external servers you don’t control. That distinction matters — a vendor’s own leak test is structurally incentivized to show clean results.
The WebRTC Leak: How Your Browser Volunteers Your IP
Web Real-Time Communication (WebRTC) is the browser API behind video calls, voice chat, and peer-to-peer file transfer in services like Google Meet, Discord, and Jitsi. To establish a direct peer connection, the browser must discover its own network addresses, and it does this by gathering ICE candidates — a list of every plausible address another peer might use to reach it. That gathering process queries STUN servers (Session Traversal Utilities for NAT), which reflect the public IP back to the requesting browser, and enumerates local interface IPs directly from the operating system.
The leak happens because the API exposes those candidates to JavaScript on any page that creates an RTCPeerConnection object. No permission prompt fires. No camera or microphone needs to be involved. A few lines of script can silently collect every IP address your browser knows about — including the real public IP your VPN was supposed to hide.
Browsers handle this differently. Firefox lets users disable the API outright via media.peerconnection.enabled in about:config. Safari on macOS and iOS implements mDNS obfuscation by default, returning randomized .local hostnames instead of raw private IPs. Chrome and Edge have no native disable switch — mitigation requires extensions like uBlock Origin (with the “prevent WebRTC from leaking local IP addresses” toggle in Settings) or Google’s own WebRTC Network Limiter. Brave blocks the leak by default in its shields. Tor Browser ships with WebRTC disabled outright.
To test, visit browserleaks.com/webrtc or ipleak.net while connected to your VPN. The test creates an RTCPeerConnection against multiple STUN servers and lists every candidate the browser produces. If any public IP returned by the STUN reflection matches your real ISP-assigned address rather than the VPN endpoint, the leak is confirmed. Local addresses in the 192.168.x.x or 10.x.x.x range are not by themselves a privacy concern — those ranges are reused across millions of routers and reveal nothing about identity. The critical line is the public IP.
How DNS Leaks Actually Happen
DNS is the address book that translates example.com into a routable IP. When you use a VPN, the assumption is that DNS queries travel through the encrypted tunnel and resolve at the VPN provider’s own resolver, leaving your ISP blind to the hostnames you visit. A DNS leak is what happens when that assumption fails — when the operating system, browser, or a misconfigured VPN client sends queries to a resolver outside the tunnel, typically your ISP’s, exposing the full list of domains you contacted.
The mechanisms are mundane and numerous. Windows’ SMHNR sends queries in parallel to every configured DNS server and accepts whichever responds first, which on a freshly connected VPN often means the ISP wins the race. Routers can hardcode DNS settings that override the VPN’s. Some ISPs run transparent DNS proxies that intercept any port-53 traffic regardless of destination and force resolution through ISP infrastructure. Browsers with DNS-over-HTTPS (DoH) enabled may bypass the system resolver entirely and send queries to Cloudflare, Google, or NextDNS — encrypted in transit but routed outside the VPN tunnel. None of these failures produce a visible error.
Testing methodology is straightforward. Sites like dnsleaktest.com, ipleak.net, and browserleaks.com/dns work by asking the browser to resolve a series of unique, single-use hostnames whose authoritative servers the test site controls. When your resolver fetches those records, the test site logs the IP of the resolver that asked. browserleaks.com/dns probes with 50 randomly generated domains — 25 IPv4-only and 25 IPv6-only — to enumerate every resolver in the chain. dnsleaktest.com offers a standard test (six queries) and an extended test (thirty-six queries) for thoroughness.
Read the results carefully. If the listed resolvers belong to your VPN provider’s ASN, the tunnel is intact. If your ISP’s name appears anywhere in the list, your DNS is leaking — even partially. A query that hits both your VPN’s resolver and your ISP’s resolver still tells your ISP what you looked up.
The IPv6 Leak Most VPNs Still Have
IPv6 is the leak vector that has lingered longest because it’s structurally awkward to fix. Many VPN clients only tunnel IPv4 traffic. If your ISP assigns you an IPv6 address (most major North American and European ISPs do in 2026), and a website supports IPv6 (most large CDNs do), your browser will quietly prefer IPv6 and route the connection outside the tunnel entirely. Your IPv4 traffic looks pristine. Your IPv6 traffic exposes everything.
The fix at the VPN level is one of two approaches: tunnel IPv6 properly alongside IPv4, or block IPv6 at the firewall level for the duration of the connection. Vendors like Mullvad and ExpressVPN implement one or the other. Vendors that do neither leave you with a half-protected connection that looks fine on a casual whatismyip check but fails the moment you load a dual-stack site. Test by visiting test-ipv6.com or the IPv6 section of ipleak.net while connected. If an IPv6 address appears and it belongs to your ISP rather than your VPN, you have an IPv6 leak. If no IPv6 address appears and your underlying connection has one, the VPN is correctly blocking it.
A Reference for the Three Tests
RTCPeerConnection queries STUN servers and enumerates local interfaces, returning candidates to JavaScript without a permission prompt.browserleaks.com/webrtc · ipleak.net192.168.x.x addresses alone are not a leak.dnsleaktest.com (extended) · browserleaks.com/dnstest-ipv6.com · ipleak.netThe Testing Methodology That Actually Works
Most users run a single leak test, see green checkmarks, and move on. That’s not a verification — it’s a snapshot of one moment under one condition. Real leak testing is a sequence that captures baseline state, induces stress, and re-verifies.
The first step is establishing your real baseline: what does your IP, DNS, and IPv6 footprint look like with the VPN disconnected? Visit ipleak.net with no tunnel active and write down the public IPv4, IPv6 (if present), and listed DNS resolvers. This is the data you must never see again while the VPN is connected.
Connect the VPN. Wait for the connection to fully stabilize — kill switches and DNS overrides sometimes take a few seconds to apply. Re-run the same test. Every value should differ from baseline. Then run the WebRTC test at browserleaks.com/webrtc separately, because some test aggregators don’t probe all STUN servers a malicious site might use. Run a DNS-specific test at dnsleaktest.com using the extended option, because the standard six-query test can miss leaks that only appear under load. Run test-ipv6.com to confirm IPv6 is either tunneled or blocked. If your VPN advertises a kill switch, simulate a connection drop — disable your network adapter briefly, re-enable it, and check whether traffic resumed before the VPN reconnected.
Repeat the cycle in every browser you actually use. WebRTC behavior diverges sharply across Firefox, Chrome, Safari, and Brave, and a leak in one browser doesn’t predict a leak in another. Repeat after every major operating system update — Windows feature updates have historically reset DNS-related privacy settings.
ipleak.net. These are the values you must never see again while connected.browserleaks.com/webrtc, DNS extended at dnsleaktest.com, IPv6 at test-ipv6.com.What Leak Tests Don’t Catch
The three-vector audit covers what most VPN users mean by “leaks,” but it isn’t a complete anonymity check. Browser fingerprinting — canvas, WebGL, font enumeration, audio context — can identify a browser uniquely even with a flawless tunnel. The EFF’s Cover Your Tracks and browserleaks.com both expose how distinctive your fingerprint is. TLS fingerprints like JA3 and JA4 identify your client by the exact handshake it negotiates, regardless of source IP. Traffic correlation attacks against Tor have been demonstrated repeatedly in academic settings, where an adversary observing both ends of a circuit can deanonymize users without breaking encryption.
If your threat model is “stop my ISP from logging which sites I visit,” the WebRTC-DNS-IPv6 audit is sufficient. If it’s “stay anonymous against a well-resourced adversary,” leak testing is necessary but nowhere near sufficient — Tor Browser, an isolated operating system like Tails or Whonix, and disciplined operational security all matter more than any VPN configuration.
FAQ
Does Tor Browser leak through WebRTC? No. Tor Browser ships with media.peerconnection.enabled set to false in about:config, disabling the WebRTC API entirely. This breaks WebRTC-dependent sites but eliminates the leak vector by design.
Are private/incognito modes enough to prevent these leaks? No. Private browsing modes prevent local history storage but do not change how WebRTC, DNS, or IPv6 traffic is routed. A leak that exists in a normal window will exist in incognito.
If my VPN passes every leak test, am I anonymous? You’re not leaking through these specific vectors. Anonymity also depends on browser fingerprint, TLS fingerprint, account logins, payment metadata, behavioral patterns, and timing correlation. Leak testing verifies one layer of a much deeper stack.
How often should I retest? After every browser major version update, every operating system update, every VPN client update, and any time you change networks (home to public Wi-Fi, for example). For high-stakes use, before every session.
A Working Definition of “Tested”
Anonymity setups fail quietly. The browser doesn’t tell you when WebRTC just emitted your real IP. The operating system doesn’t warn you when SMHNR raced your ISP’s resolver and won. The VPN client status icon stays green throughout. The only way to know your configuration works is to run external probes against it and read the results carefully.
Treat leak testing as part of the setup, not as an afterthought. A VPN that hasn’t been verified end-to-end against an external test is in the same category as a backup that has never been restored — possibly fine, possibly worthless, and you won’t find out which until it matters.